Managing Projects
Managing projects
Projects are the primary way to segment support within a tenant. Each project represents a distinct product line or application and gets its own tickets, channels, tags, SLA policies, and customer portal. The Projects page lets you manage all of this from a single view.
What projects scope
Resources that are project-scoped (isolated per project):
| Resource | Description |
|---|---|
| Tickets | Every ticket belongs to exactly one project. |
| Channels | Email, web, Slack, and other channels are configured per project. |
| Tags | Ticket classification tags are defined per project. |
| SLA policies | Response and resolution targets are set per project. |
| Customer portal | Each project can have its own white-labeled portal. |
Resources that are tenant-scoped (shared across projects):
| Resource | Description |
|---|---|
| Agents | All agents can work tickets in any project. |
| Customers | A customer record exists once and can submit tickets to any project. |
| Departments | Organizational units span all projects. |
Viewing projects
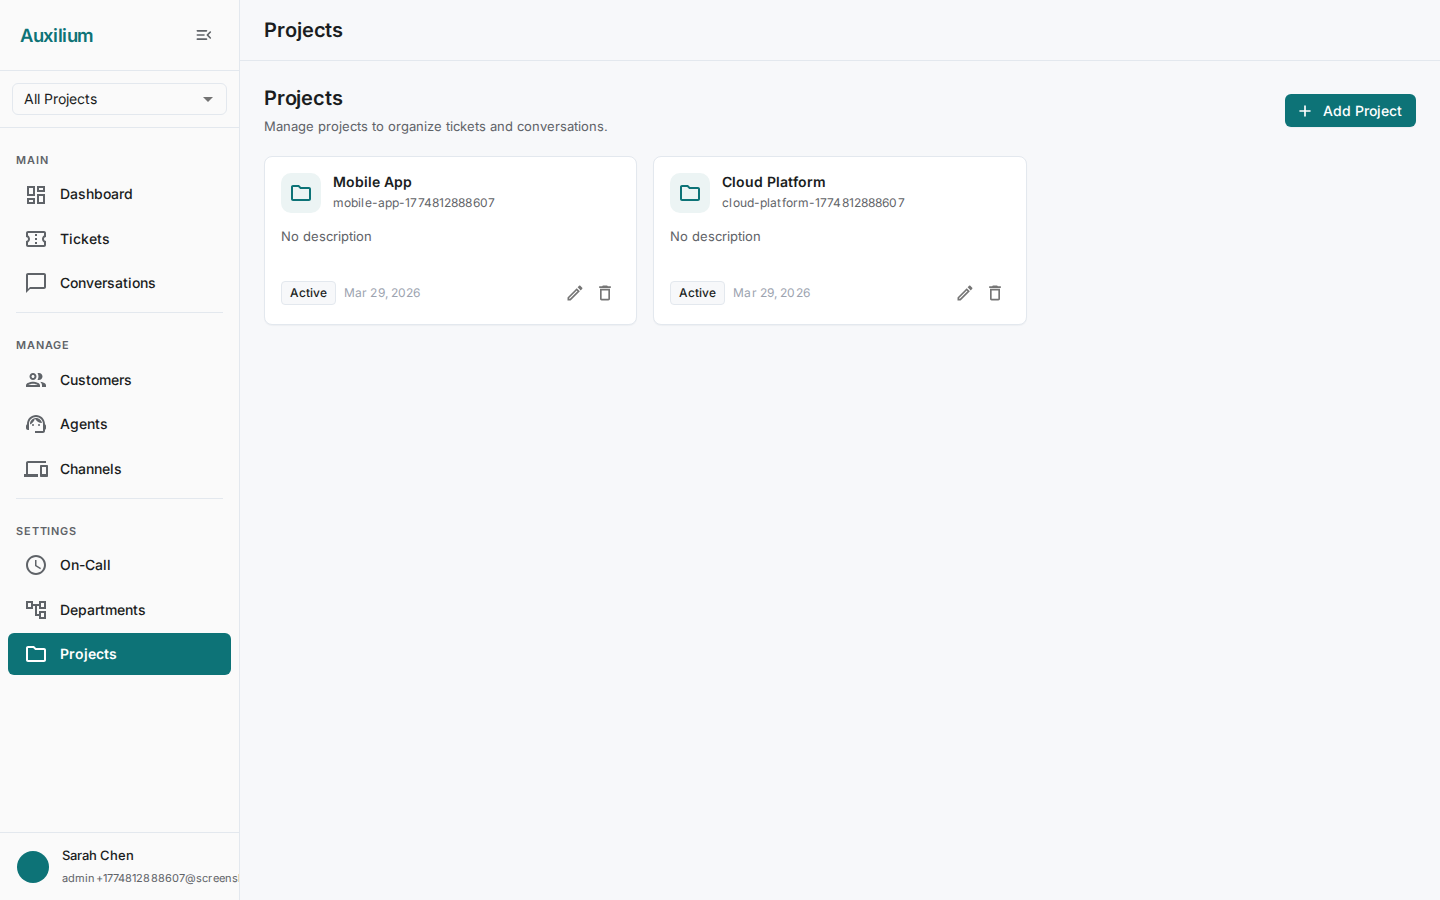
Navigate to Projects from the main sidebar. The page header shows the title “Projects” and an Add Project button on the right.
Projects are displayed in a grid layout with three columns. Each project card shows:
- A folder icon and the project name with its slug underneath.
- The project description, truncated to two lines.
- A Status chip – Active (green) or Inactive (gray).
- The Created date.
- Edit and Delete buttons at the bottom of the card.
Creating a project
- Click the Add Project button. The Create Project dialog opens.
- Fill in the fields:
- Project Name – the display name for the project. As you type, the slug field is auto-generated from the name.
- Slug – a URL-safe identifier using lowercase letters, numbers, and hyphens. This is auto-populated but you can edit it manually. The slug must be unique within the tenant.
- Description – a multiline text field describing the project’s purpose. Optional but recommended.
- Click Create to save.
The new project card appears in the grid immediately with an Active status.
Editing a project
- Click the Edit button on a project card. The Edit Project dialog opens with the current values pre-filled.
- Update any of the following:
- Project Name – change the display name.
- Slug – update the URL-safe identifier.
- Description – modify the project description.
- Active toggle – flip this to activate or deactivate the project.
- Click Save to apply changes.
Activating and deactivating projects
Use the Active toggle in the Edit Project dialog to control a project’s status.
- Active projects accept new tickets through their channels and display an Active chip on the project card.
- Inactive projects stop accepting new tickets, but existing tickets remain accessible and can still be resolved. The project card displays an Inactive chip.
Deactivation is useful when sunsetting a product. You can keep the project around to resolve remaining tickets without new work flowing in.
Deleting a project
- Click the Delete button on a project card. A confirmation dialog appears with a warning message.
- Review the warning and click Delete to confirm, or Cancel to back out.
Deleting a project permanently removes it along with all its scoped resources (channels, tags, SLA policies, portal configuration). This action cannot be undone.