Portal Setup
A portal is a whitelabeled, self-service support interface that your customers use to submit tickets, track their requests, and communicate with your team. Each portal is tied to a project and served on its own subdomain.
Creating a portal
Portals are managed from the admin UI. To create one:
- Navigate to the Portals section in the admin sidebar.
- Click Create Portal.
- Fill in the configuration fields (see below).
- Click Save.
New portals start in an inactive state, giving you time to configure branding and test the setup before customers can access them.
Portal configuration
When creating or editing a portal, you configure the following fields:
| Field | Description |
|---|---|
| Display name | The name shown on the portal login page heading, header, and browser tab (e.g., “Acme Support”). |
| Primary color | A hex color value (e.g., #1976d2) applied to buttons, links, and accent elements across the portal. |
| Logo URL | URL to an image displayed above the login form and in the portal header. SVG or transparent PNG recommended. |
| Subdomain | A globally unique subdomain. The portal is served at {subdomain}.auxilium.srs-ngr.com. |
| Project | The project this portal is associated with. All tickets created through the portal belong to this project. |
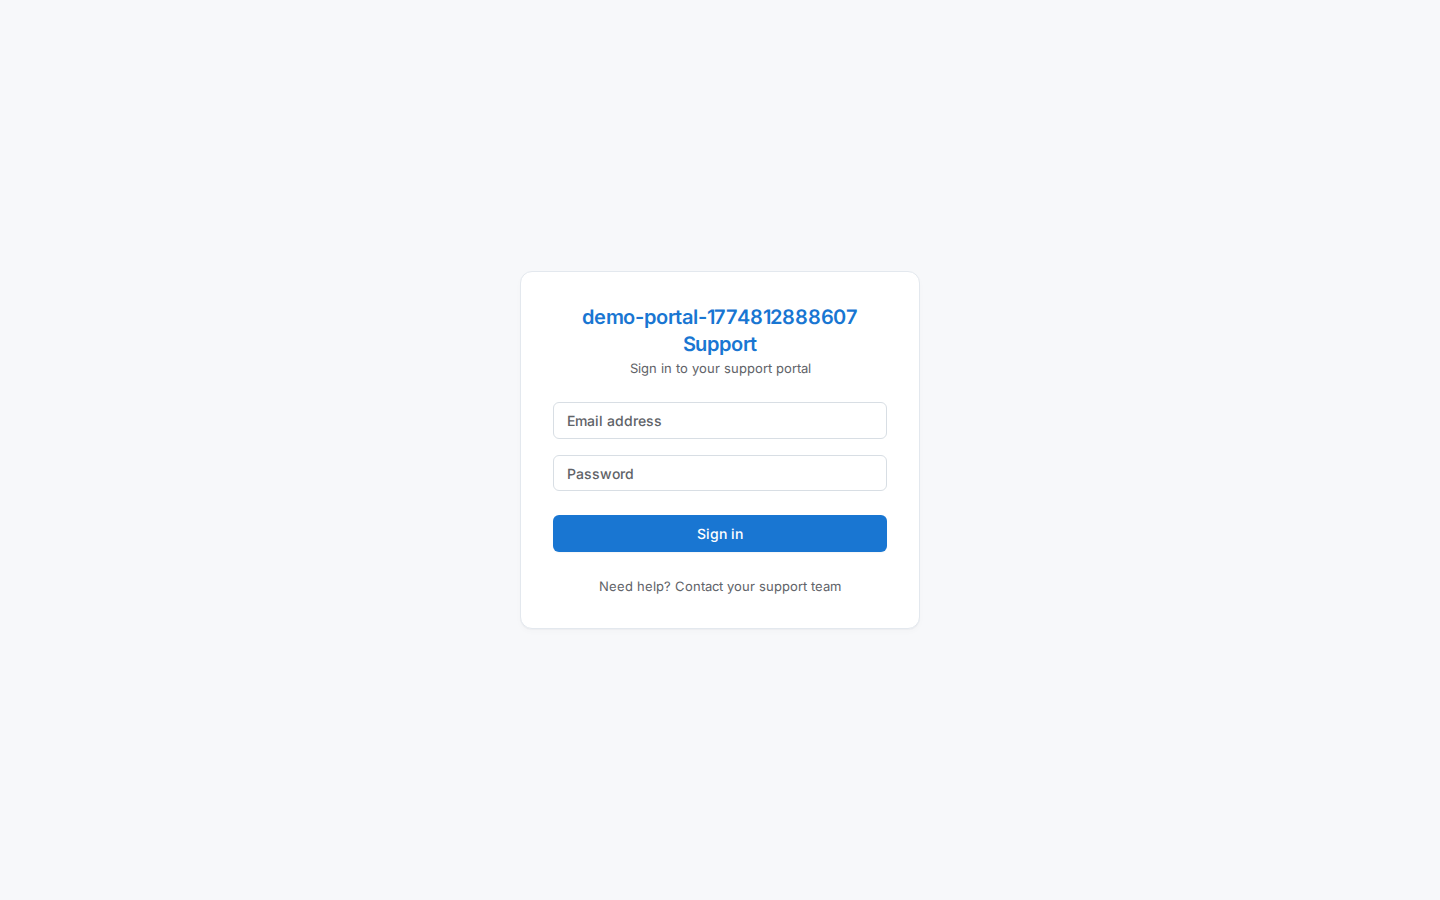
How the portal appears to customers
Once activated, customers visit the portal URL and see a branded login page:
- The logo (if configured) appears above the login form.
- The display name is shown as the page heading, styled with the portal’s primary color.
- Two input fields prompt for Email address and Password.
- A full-width Sign in button (using the primary color) submits the form. It shows a loading spinner while authenticating.
- Help text below the form reads: “Need help? Contact your support team.”
After signing in, customers land on the My Tickets page where they can view existing requests and create new ones.
Multiple portals per project
A single project can have multiple portals with different branding. This is useful when you operate several customer-facing brands that share the same support team and ticket queue.
For example, a SaaS company that offers both “Acme Pro” and “Acme Starter” could create two portals with distinct display names, colors, and logos – both routing tickets to the same project.
Activating and deactivating
Toggle portal visibility from the portal settings page:
- Active – customers can access the login page and all portal functionality.
- Inactive – the login page is inaccessible and new logins are blocked. Existing sessions are not terminated.