Quickstart
Quickstart
This guide walks you through the essential steps to get a working support setup: log in, explore the Dashboard, create a project, add agents, configure an email channel, register a customer, create your first ticket, and use the Conversations Inbox.
1. Log in
- Navigate to your Auxilium instance and open the /login page.
- Enter your email and password.
- Click Sign In.
After authentication, you land on the Dashboard.
2. Explore the Dashboard
The Dashboard is your operational command center. It gives you a real-time snapshot of your support operation at a glance.
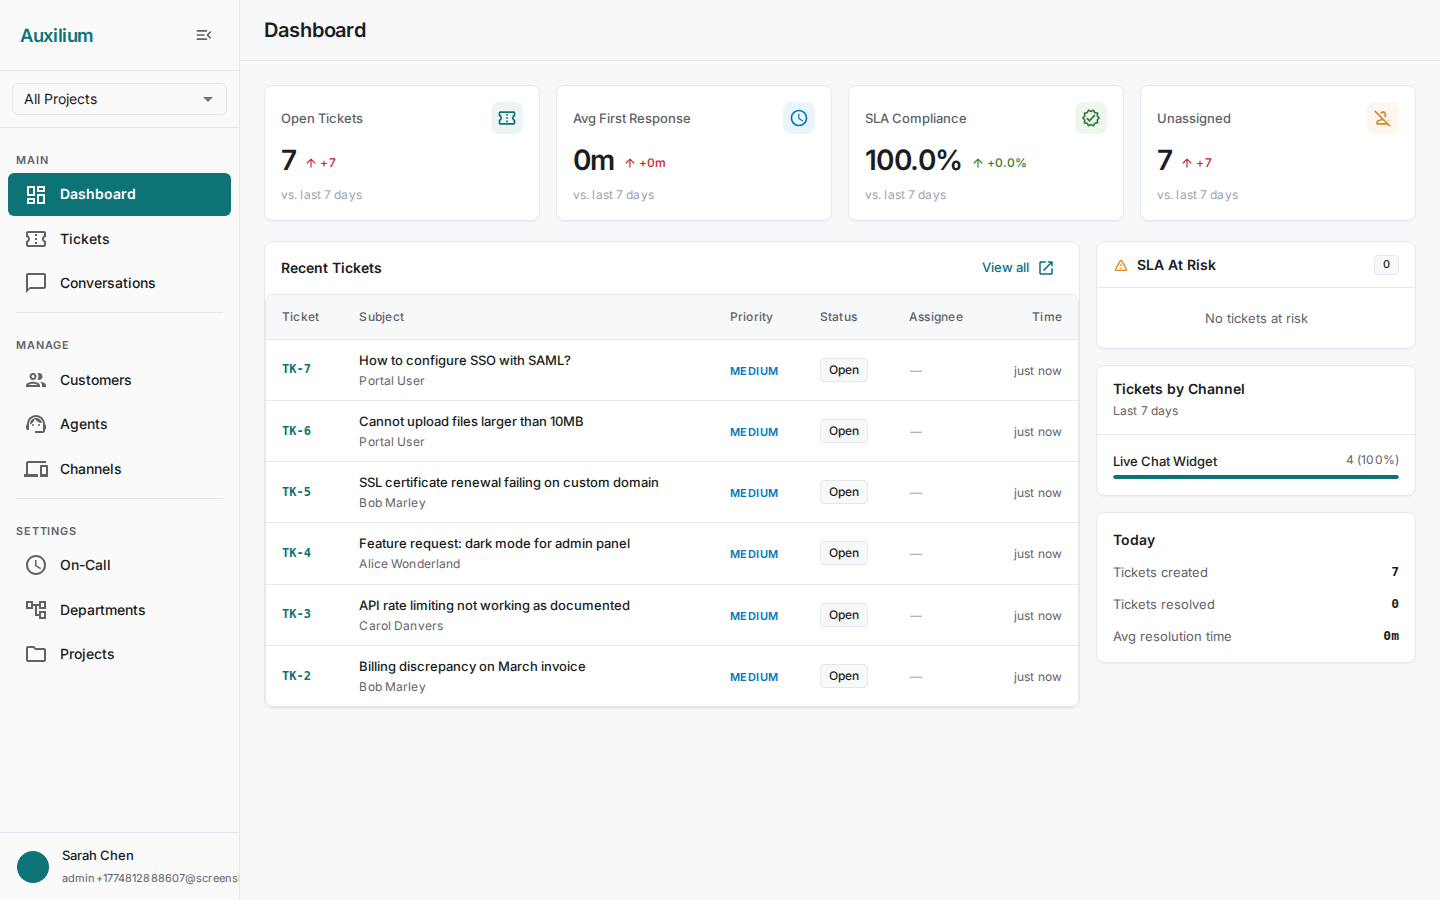
The Dashboard includes:
- 4 KPI cards at the top – Open Tickets, Average First Response, SLA Compliance, and Unassigned Tickets.
- Recent Tickets table showing the latest activity across all projects.
- SLA At Risk panel highlighting tickets approaching their response or resolution deadlines.
- Tickets by Channel chart showing how customers are reaching you.
- Today’s Stats summarizing the current day’s ticket volume and activity.
3. Create a project
Projects organize support by product line. Each project gets its own channels, tickets, tags, and SLA policies.
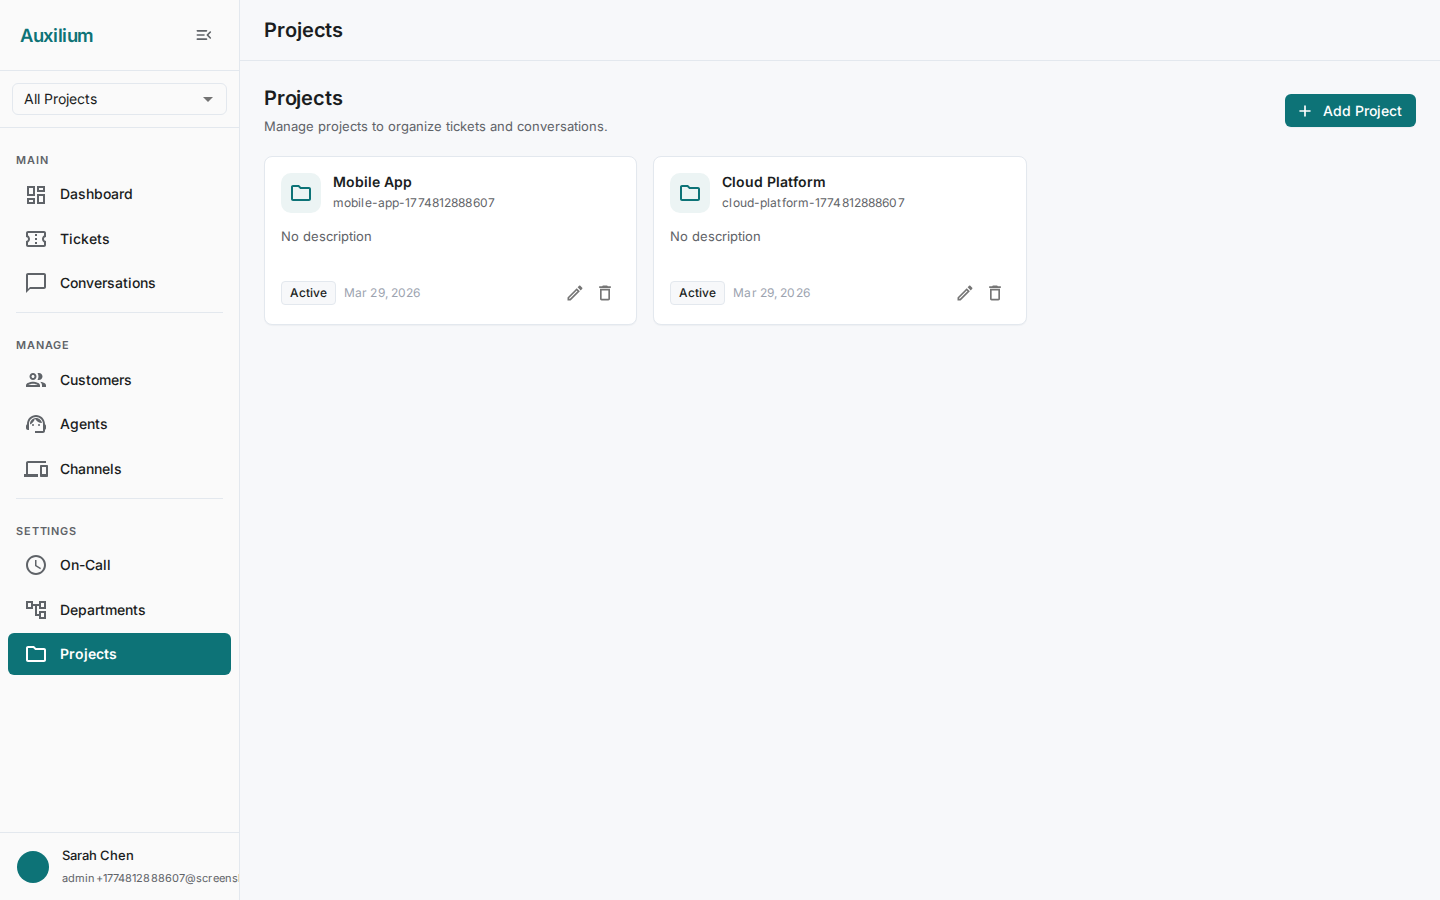
- Navigate to the Projects page from the sidebar.
- Click the Add Project button.
- In the dialog, fill in:
- Project Name – for example, “CloudStore”. The slug is auto-generated from the name.
- Slug – adjust if needed. This is a URL-safe identifier unique within your organization.
- Description – optional, but helpful for your team to know what the project covers.
- Click Create.
Your new project appears in the list and is ready to receive channels, tickets, and SLA policies.
4. Add an agent
Agents are the team members who handle support. You can add as many as your team needs.
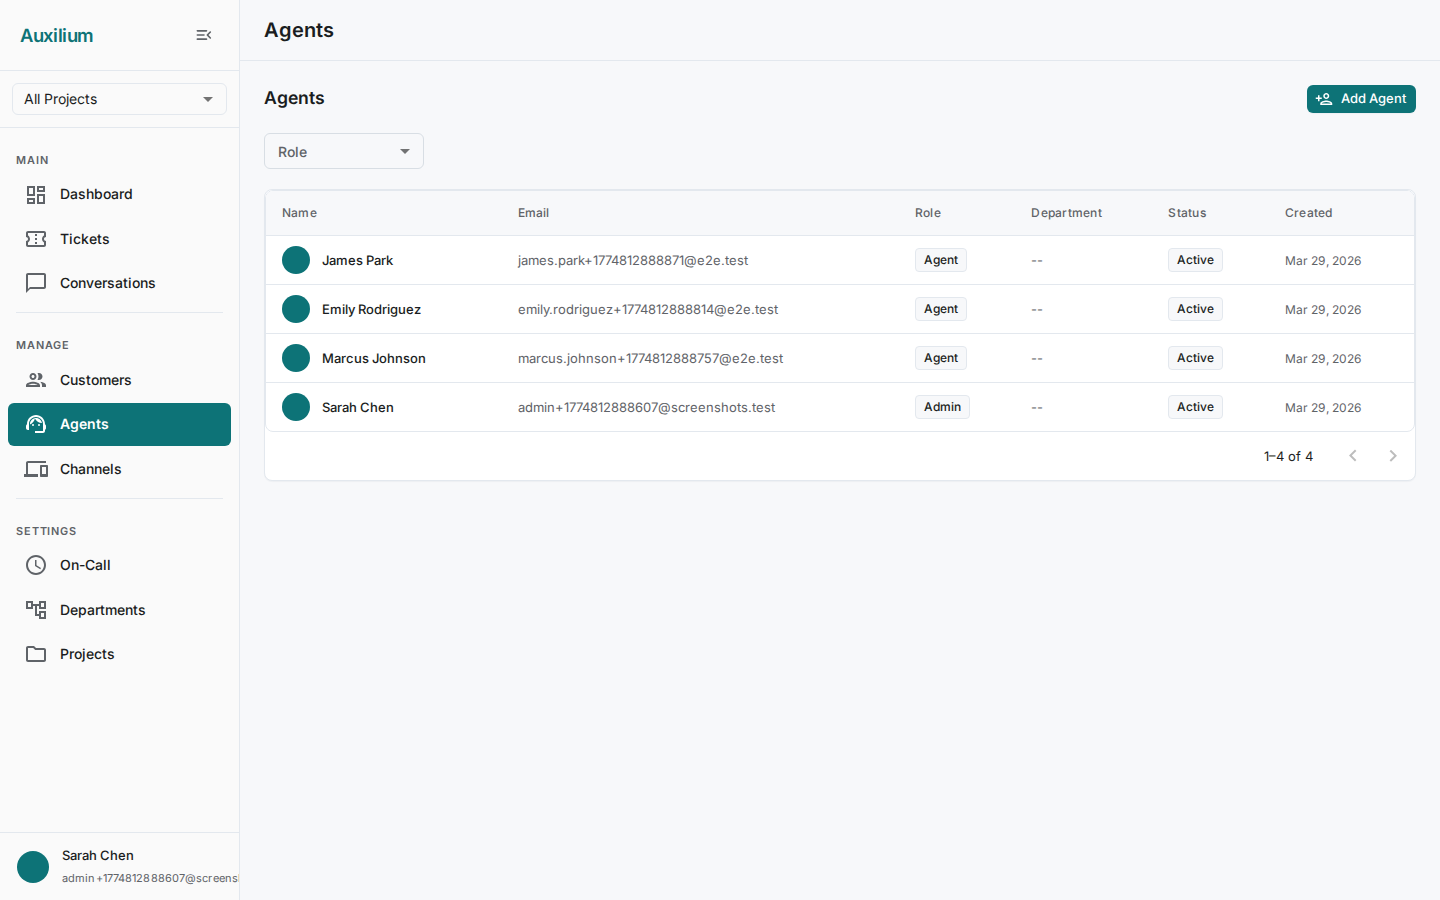
- Navigate to the Agents page from the sidebar.
- Click the Add Agent button.
- In the dialog, fill in:
- Name – the agent’s display name.
- Email – must be unique within your organization.
- Role – choose from the dropdown:
- Admin – full access to all settings and tickets.
- Manager – can oversee teams and reassign tickets.
- Agent – handles assigned tickets and conversations.
- Department – select from the dropdown if you have departments configured.
- Password – set an initial password for the agent.
- Click Create.
The new agent can now log in and start handling tickets.
5. Set up a channel
Channels connect customers to your support team. This example walks through setting up an email channel, but the process is similar for other channel types.
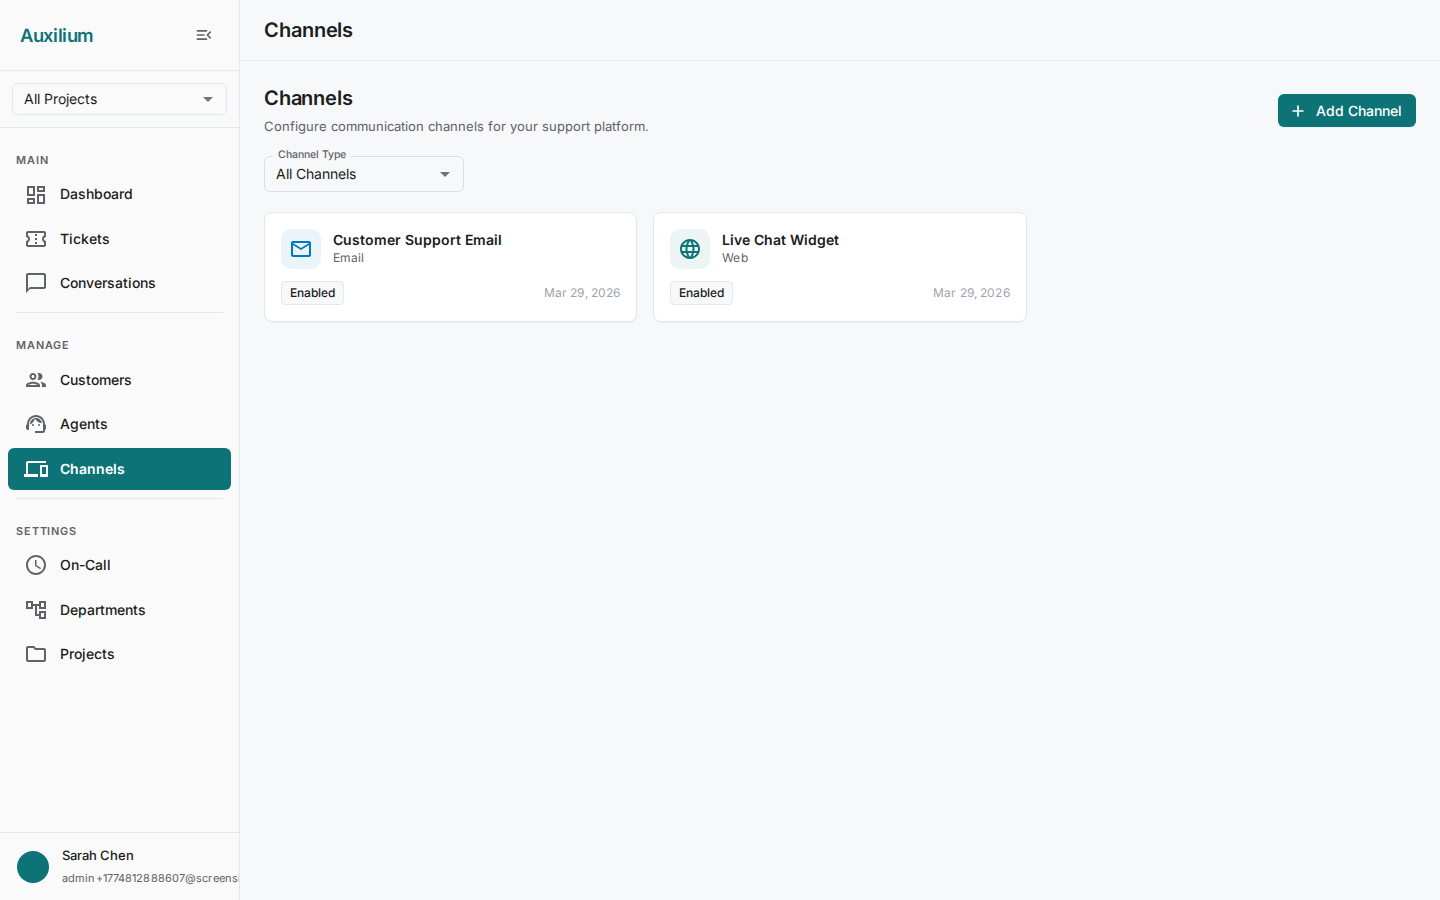
- Navigate to the Channels page from the sidebar.
- Click the Add Channel button.
- In the dialog, fill in:
- Channel Name – for example, “Support Email”.
- Channel Type – select Email from the dropdown.
- For an Email channel, configure the mail server settings:
- IMAP Settings (for receiving mail):
- Host – your IMAP server address (e.g.,
imap.yourcompany.com). - Port – typically
993for TLS. - Username – the mailbox login.
- Password – the mailbox password.
- TLS – toggle on for secure connections (recommended).
- Mailbox – the folder to monitor (e.g.,
INBOX).
- Host – your IMAP server address (e.g.,
- SMTP Settings (for sending mail):
- Host – your SMTP server address (e.g.,
smtp.yourcompany.com). - Port – typically
587for TLS. - Username – the SMTP login.
- Password – the SMTP password.
- TLS – toggle on for secure connections (recommended).
- From Name – the display name on outgoing mail (e.g., “Acme Support”).
- From Address – the email address replies come from.
- Host – your SMTP server address (e.g.,
- Support Address – the address customers use to contact you.
- IMAP Settings (for receiving mail):
- Click Test Connection to verify that both IMAP and SMTP settings are valid. You will see a success or failure indicator for each.
- Once the connection test passes, click Create.
6. Add a customer
Customers are the people your team supports. You can add them manually or let them self-register through the Customer Portal.
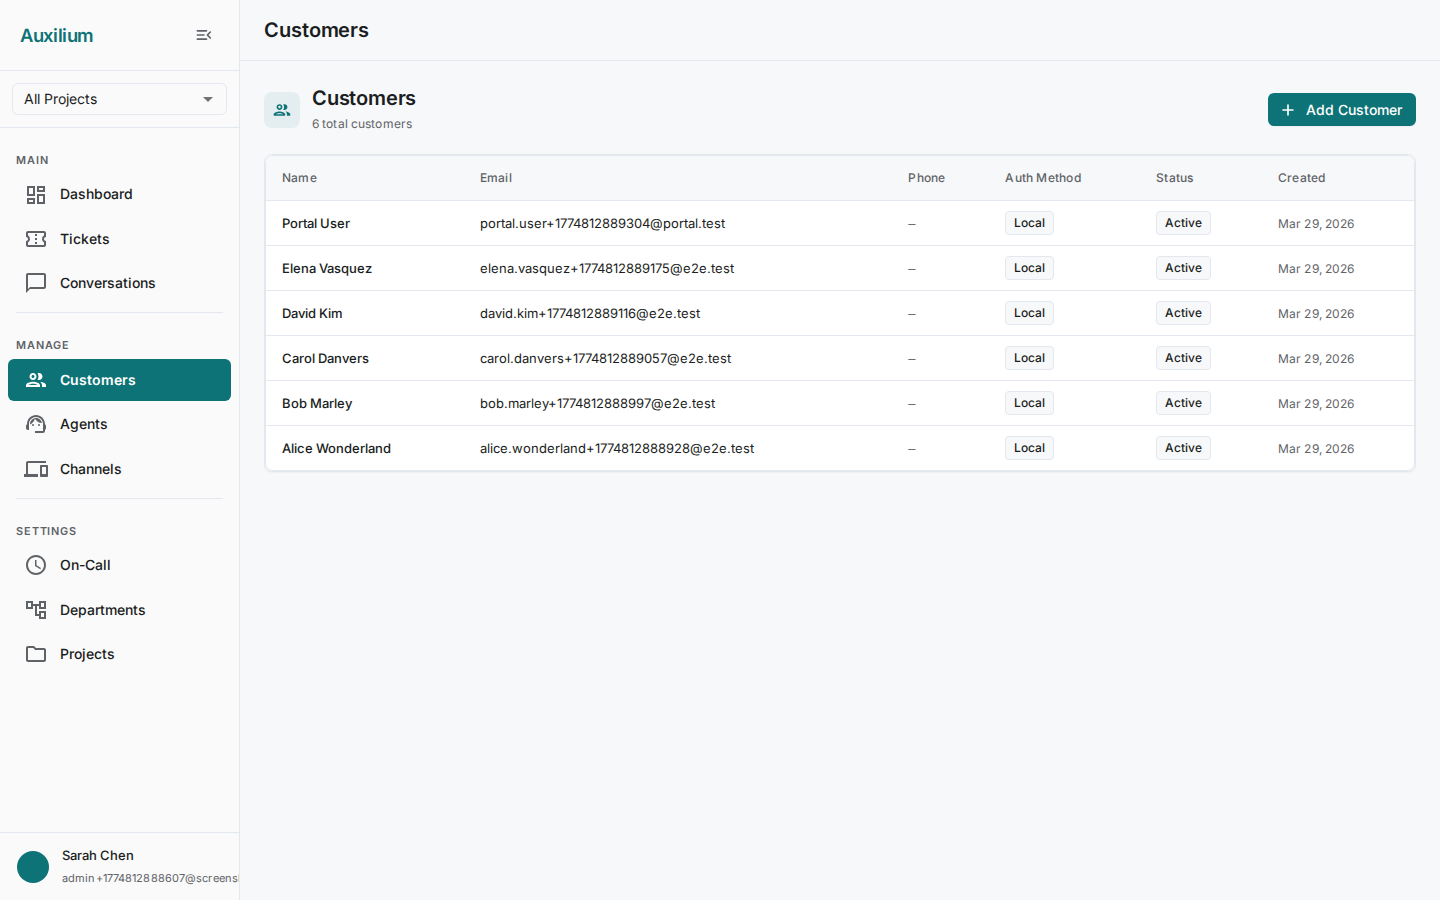
- Navigate to the Customers page from the sidebar.
- Click the Add Customer button.
- In the dialog, fill in:
- Name – the customer’s display name.
- Email – their contact email.
- Phone – their contact phone number (optional).
- Auth Method – choose from the dropdown:
- Local – the customer logs in with email and password. You will need to set a password.
- IDP – the customer authenticates through an external identity provider.
- Anonymous – the customer interacts without an account.
- Password – required if you selected Local authentication.
- Click Create.
7. Handle your first ticket
Now that you have a project, an agent, a channel, and a customer, you are ready to create and work through a ticket.
Create the ticket
- Navigate to the Tickets page from the sidebar.
- Click Create Ticket.
- In the dialog, fill in:
- Customer – select the customer from the dropdown.
- Subject – a short summary of the issue (e.g., “Cannot reset my password”).
- Description – the full details of the problem.
- Priority – select from the dropdown (Urgent, High, Medium, or Low).
- Click Create.
Work the ticket
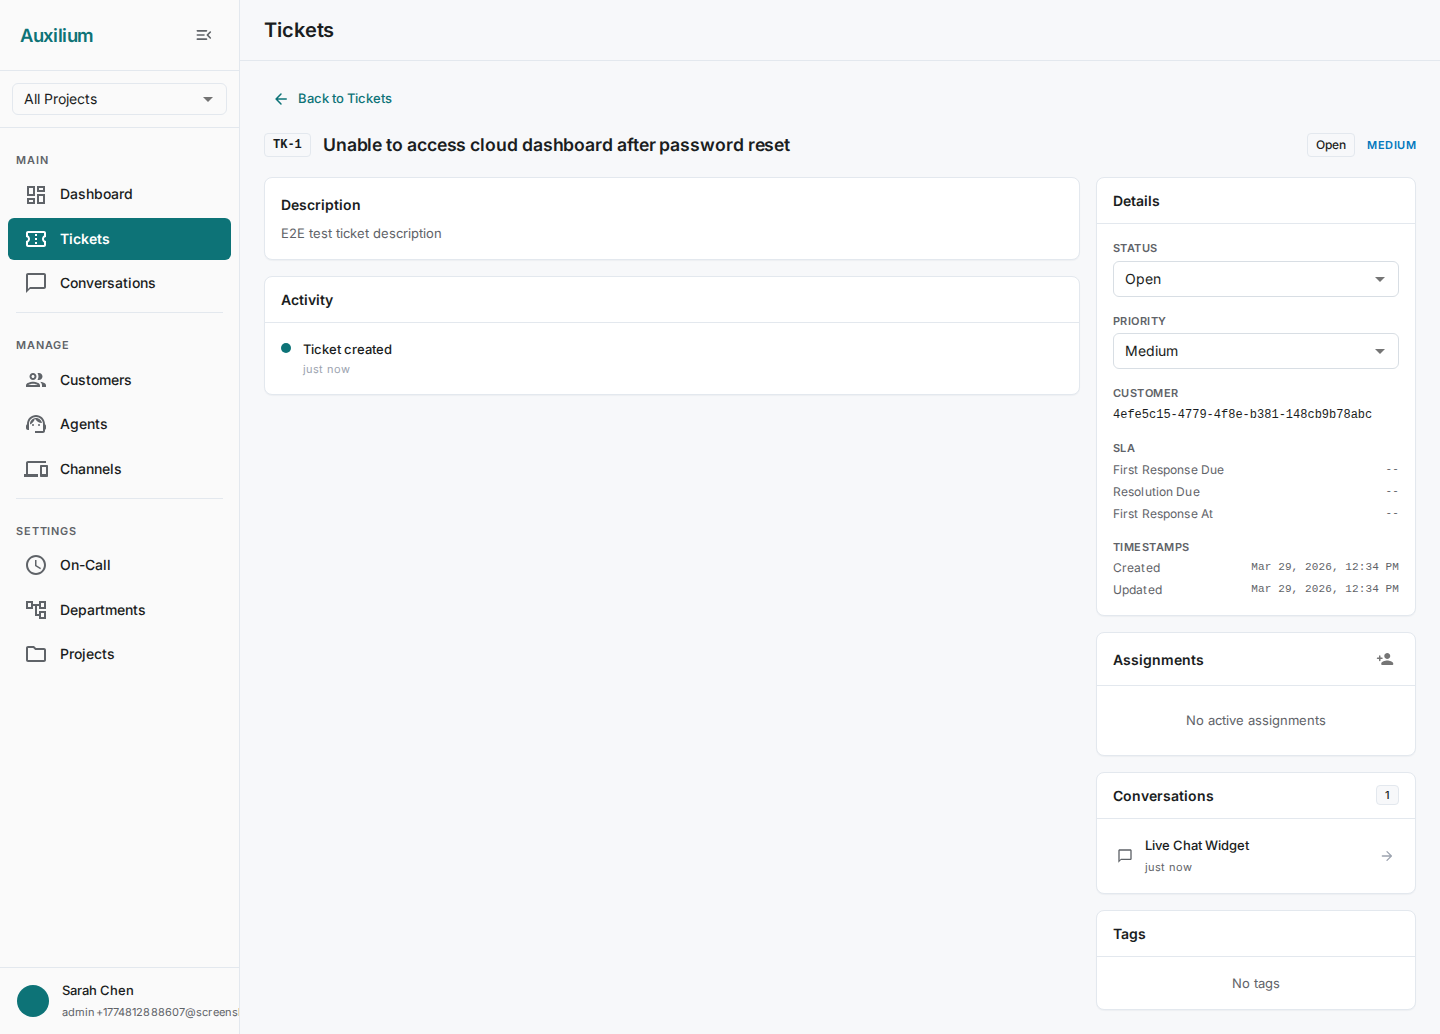
- On the Tickets page, click the ticket row to open its detail view.
- In the sidebar, use the Status dropdown to change the ticket’s status (e.g., from Open to In Progress).
- Use the Priority dropdown to adjust priority if needed.
- Click the "+" button in the assignments section to assign the ticket to an agent or department.
- Scroll down to see the activity timeline, which records every change made to the ticket.
8. Use the Conversations Inbox
The Conversations Inbox is where agents read and respond to customer messages across all channels.
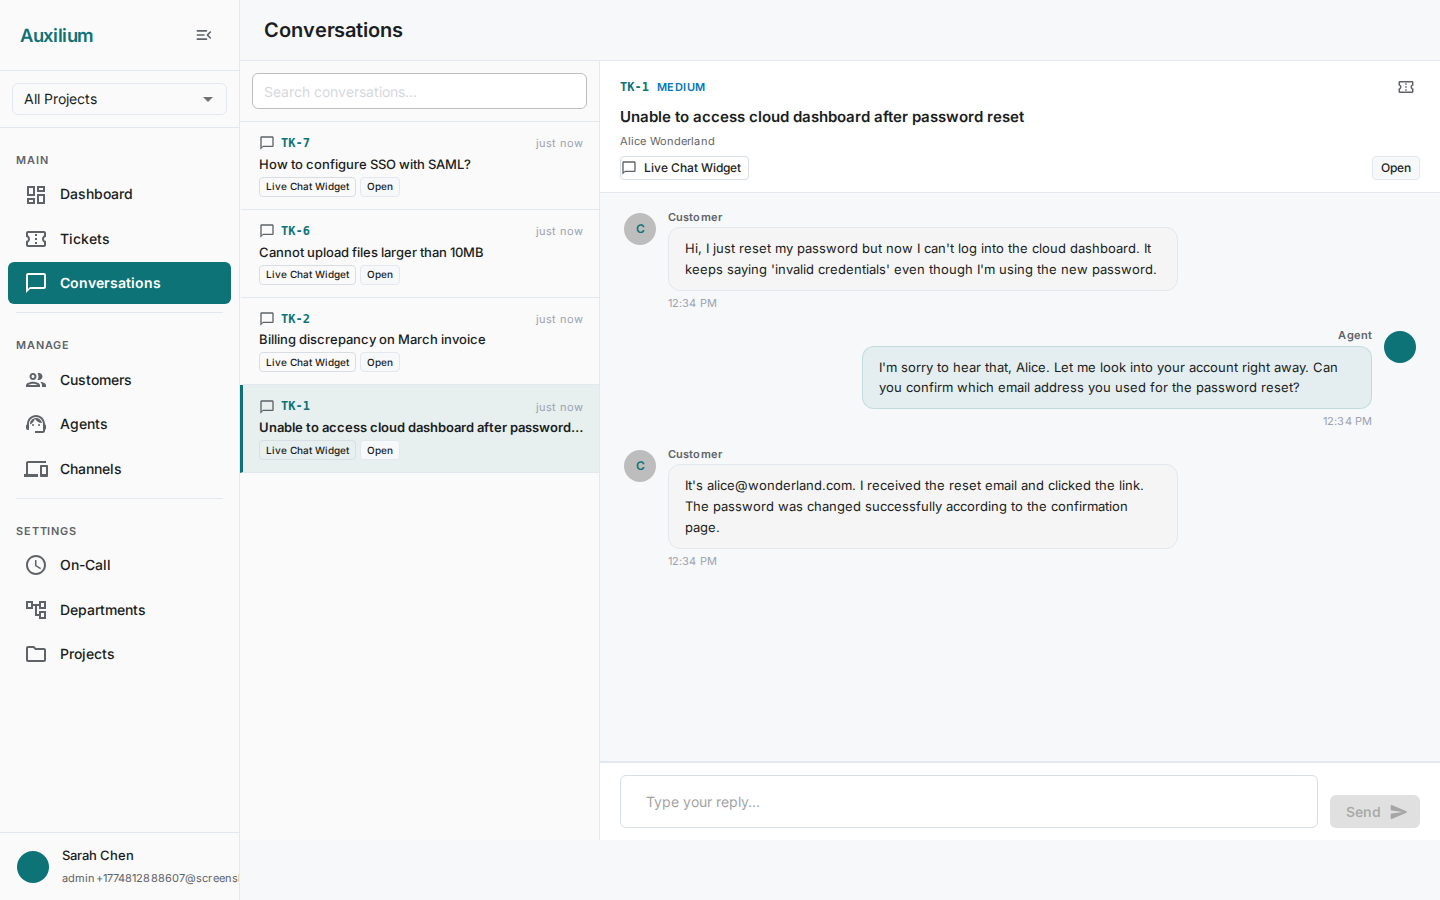
- Navigate to the Conversations page from the sidebar.
- The left panel shows a list of conversations. Each entry displays:
- The ticket number and customer name.
- A channel chip showing which channel the conversation came through (Email, Web, Slack, etc.).
- A status chip showing the ticket’s current state.
- Click a conversation to open the message thread in the main panel.
- Read through the message history – messages are labeled by sender (customer, agent, system, or bot).
- Type your reply in the composer at the bottom of the thread.
- Click Send.
What you have set up
After completing these steps, you have:
- A project organizing your support stream by product line.
- An agent on your team, ready to handle tickets.
- An email channel connected to your mail server and verified.
- A customer registered in the system.
- A ticket moving through its lifecycle, with assignments and an activity timeline.
- The Conversations Inbox for reading and replying to customer messages.
Next steps
- Set up SLA Policies to define response and resolution targets for each priority level.
- Configure additional Channels (Slack, web widget, WhatsApp) to meet customers where they are.
- Launch the Customer Portal so customers can submit and track tickets on their own.
- Add more Agents and organize them into Departments as your team grows.